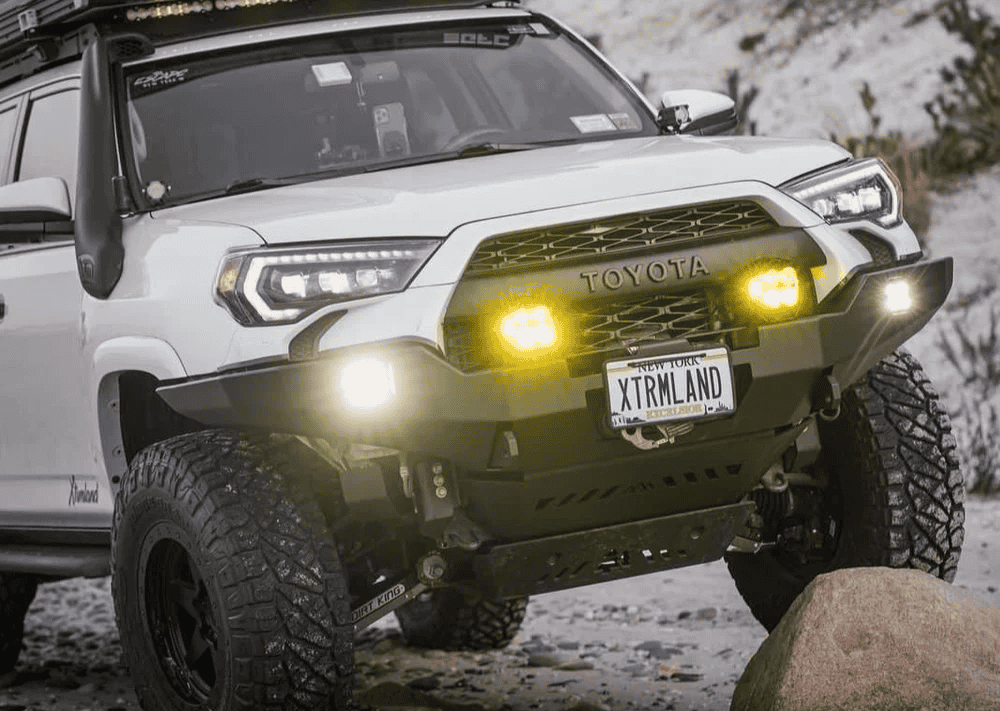
Overland Vehicles

A light bar is only as reliable as its wiring. Begin by estimating current draw. Divide the total wattage by system voltage to get amps, then size wire and fuses accordingly. Most single bars fall between 10 and 25 amps, while big dual row setups can push higher. Place a fuse within a few inches of the battery positive to protect the entire run, not just the lamp.
Use a relay to switch higher current loads without pushing that current through the dash switch. A common setup uses battery positive to relay pin 30, lamp positive on pin 87, ground on pin 85, and a low draw switch feed to pin 86. This keeps the cabin circuit light and reduces heat in the switch.
Long roof runs can sap voltage. Keep total voltage drop under three percent for bright, consistent output. Select wire gauge based on length and amps. Thicker copper means less resistance and brighter light under load. Use fine strand automotive primary wire, not household wire.
Crimp with ratcheting tools and closed barrel terminals, then seal with adhesive lined heat shrink. Weather rated connectors and a tidy split loom protect against abrasion, salt, and mud. Add grommets where wiring passes through metal. Keep harnesses clear of sharp edges, exhaust, and steering components.
You can trigger the relay from a simple rocker, an ignition source for automatic shutoff, or a programmable switch panel. Solid state panels add circuit protection and provide labeled, backlit controls for multiple lights. If you want the bar to follow high beam logic, use a trigger from the headlight circuit to switch the relay, not to power the lamp.
Mount grounds to clean, bare metal. Avoid stacking too many rings on a single bolt. For aluminum roofs or composite racks, run a dedicated ground back to the chassis or battery negative to prevent flicker and radio noise.
LED drivers can radiate electrical noise. Keep lighting harnesses away from antenna cables and audio wiring. If you notice static, ensure grounds are short and solid, and avoid tiny switch grounds stretched across the cabin.
Roof mounts demand careful routing. Run the loom along the rack channel, secure it with P clamps, and drop through a sealed pass through. A drip loop before the entry point helps shed water. Where possible, follow factory harness paths and existing grommets to reach the engine bay.
Modern vehicles often use networked lighting controls. Do not pull power from body control modules or headlight outputs. Use an add a circuit fuse tap in an accessory slot for a low draw relay trigger only. The lamp’s power should come directly from the battery or a dedicated accessory bus with proper protection.
Frequent night trail use benefits from a power distribution module or an auxiliary battery. These systems centralize fuses, simplify service, and keep starting power safe. If you run a fridge, compressor, and multiple bars, size the system for combined load and recharge strategy.
Silicone only goes so far. Use bulkhead glands, marine style heat shrink, and sealed housings rated for spray and dust. Mount relays upright with the tab facing up to keep moisture out, and locate them away from heat wash near radiators and turbos.
Before buttoning up, test with a multimeter. Verify battery voltage at the lamp with the bar on, confirm fuse size, and check for warm connections after five minutes of operation. Aim the bar on level ground. Keep the hot spot below the horizon to prevent glare. Many states require covers on forward facing auxiliary lights when driving on public roads, so check local rules and use the bar responsibly.
Label circuits, leave a slack service loop, and document fuse sizes. Future upgrades come easier when the harness is mapped, and trail fixes are faster when you can read your own work.
If your rig is more than a weekend toy, professional routing and integration pays off. Clean looms, sealed pass throughs, and thoughtful control placement make night driving safer and reduce electrical gremlins later. For full vehicle lighting strategies that tie into racks, bumpers, and onboard power, the right partner keeps everything tidy and compliant.
OZK Customs builds complete overland systems and integrates lighting with power distribution, switch panels, and rack solutions. Explore how we approach builds on our overland rigs page. If you want wiring that looks factory and handles trail abuse, see our Custom Overland Upfit services. Curious about process and standards, visit Why Choose OZK Customs.
Tell us how and where you drive, and we will engineer a lighting system that is bright, quiet, and dependable. From relay logic to roof pass throughs and fuse mapping, our team designs clean, serviceable wiring that holds up to weather and washboard roads. Share your vehicle and lighting goals, and we will turn that plan into a reliable, trail ready setup.
Ready to upgrade lighting without guesswork? Our team designs and installs clean, serviceable wiring that survives washboard roads and weather. Tell us your vehicle, light count, and use case, and we will build a dependable system that just works.
ADDRESS:
6159 E Huntsville Rd, Fayetteville, AR 72701
PHONE:
(479) 326-9200
EMAIL:
info@ozkvans.com